


There's nothing quite like the feeling of walking down the aisle holding something you made with your own two hands. Creating your own bridal bouquet is one of the most personal, meaningful touches you can add to your wedding day. It’s more than just a project—it’s a chance to weave your story, your style, and your heart into every single bloom.
This guide is designed to give you the confidence and the know-how to craft a bouquet that’s not only gorgeous but also a true reflection of you. We'll go through the entire process, from picking the perfect flowers to putting them all together.
Your Guide to Crafting a Personal Bridal Bouquet
Think of this as your personal floral workshop. We're moving beyond basic instructions to share the real techniques professional florists use to make sure your bouquet is stunning, stable, and lasts through every photo and dance.
Taking this on isn't just about managing your budget. It's about creating an heirloom, a keepsake filled with memories before it even makes its debut.
Why Make Your Own Bouquet?
The decision to DIY your bouquet is incredibly empowering. It gives you total creative freedom over the final look, feel, and even the scent of your arrangement. You're not just choosing pretty flowers; you're selecting symbols and memories that mean something special to you and your partner. This hands-on process adds a beautiful layer of intimacy and accomplishment to your wedding preparations.
A few of the biggest perks include:
- Complete Personalization: Every flower, every piece of greenery, and every ribbon can be chosen to perfectly match your story.
- A Deeper Connection: The act of creating something so central to your wedding day forges a powerful, tangible connection to the moment.
- Smart Savings: While you should always invest in high-quality flowers, going the DIY route can be much friendlier on your wallet than a fully custom piece.
This project is a beautiful way to slow down amidst the chaos of wedding planning. It’s a moment to focus on creating a tangible piece of your story—an act of love for yourself and your partner.
As you get into the details of planning, you might also be exploring how technology can help. For a look at how modern tools are changing the game, it's interesting to read about AI tools for wedding planning.
Ultimately, learning how to make your own bridal bouquet ensures the accessory you carry is a genuine extension of who you are. It’s a craft that blends artistry with emotion, resulting in a one-of-a-kind masterpiece you’ll cherish in photos for a lifetime.
Gathering Your Floral Design Essentials
Before you even think about touching a flower, let's talk about setting up your workspace. Having the right tools ready to go is the secret to a smooth, enjoyable process that ends with a professional-looking bouquet.
Think of it like a chef prepping their station. Getting everything in order first means you can stay in the creative zone without frantically searching for scissors or tape. It turns the whole experience from a chore into a genuine art form.
Plus, the right equipment directly impacts how long your beautiful flowers will last. A clean, sharp cut helps stems drink water, and the right tape gives your bouquet the support it needs to hold up all day. It’s a small investment that pays off in a big way.
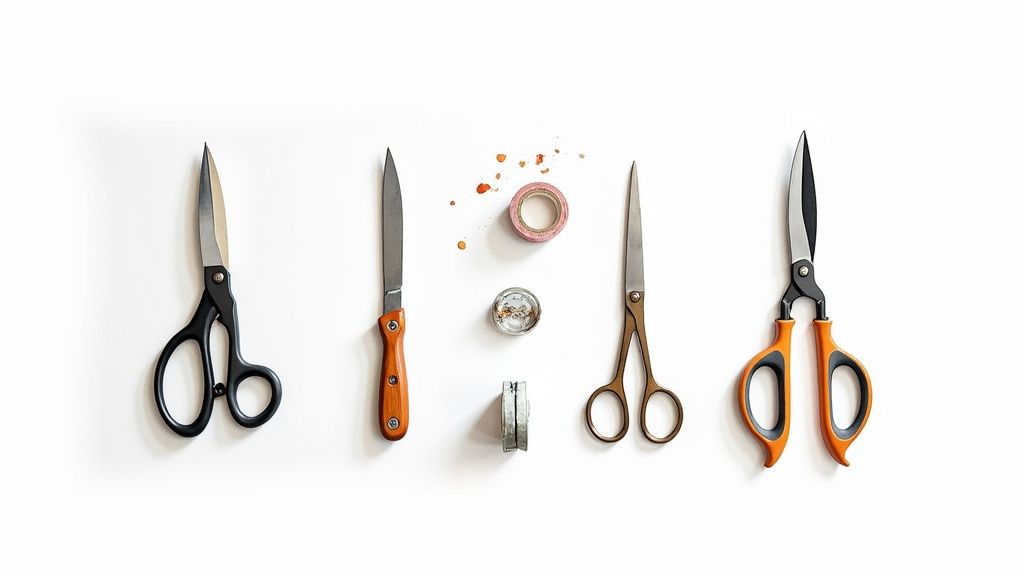
Your Must-Have Tool Checklist
You don’t need a whole floral shop to create something stunning—just a few key pieces. Most of this stuff can be found at local craft stores, online floral suppliers, or even a well-stocked hardware store.
Here's your core toolkit:
- Floral Shears or Snips: This is a non-negotiable. Unlike regular scissors that crush delicate stems, a sharp pair of floral shears makes a clean, angled cut. This is absolutely crucial for letting the blooms drink water and stay fresh.
- Thorn Stripper: If you’re working with roses, this tool is your best friend. It quickly and safely takes off thorns and lower leaves without hurting the stem, saving your hands and your flowers.
- Waterproof Floral Tape: This is the real workhorse of bouquet making. It’s a green, stretchy tape that gets sticky when you pull it, and it’s perfect for binding stems together securely. Because it's waterproof, it won't fall apart when it gets wet.
- Floral Wire: Available in different gauges (thicknesses), floral wire is perfect for giving a little extra support to delicate stems like ranunculus or for coaxing stubborn greenery into place. A medium gauge, like 22 or 24, is a great, versatile place to start.
Beyond the Basics: Finishing Touches
Once you’ve got the essentials, a few extra supplies will help you add those polished, final details. These items are all about presentation and preservation, turning your arrangement into a true bridal accessory.
A dedicated workspace is just as important as the tools. Clear off a big table, protect it with newspaper or a drop cloth, and have a few buckets of clean, cool water ready to keep your prepped flowers hydrated while you work.
Consider adding these to your shopping list:
- Ribbon or Fabric Wrap: Here's where you bring in your wedding colors and personal style. Satin, silk, velvet, or even a rustic twine can be used to cover the floral tape and create a beautiful, comfortable handle.
- Corsage Pins or Pearl-Headed Pins: Use these to secure your ribbon wrap neatly. They add a little decorative flair and ensure nothing unravels right before you walk down the aisle. A few well-placed pins are both functional and beautiful.
- Finishing Spray (like Crowning Glory): This is a little secret from the pros. A light mist of a finishing spray helps lock in moisture, slowing down dehydration and keeping your flowers looking vibrant for hours longer. It's an optional step, but one we highly recommend, especially for an outdoor wedding or a long day of celebrating.
Choosing the Perfect Flowers for Your Bouquet
This is where the magic really begins. The flowers you choose are the soul of your bouquet, telling your story and setting the entire tone for your wedding day. It’s where your theme, color palette, and the season all come together in one beautiful, fragrant bundle.
When you start thinking like a floral designer, you see flowers for more than just their beauty; you see them for the role they play. A truly stunning bouquet is a team effort, with different blooms working in harmony to create balance, texture, and visual interest.
Understanding these roles is the secret to creating a bouquet that looks intentional and professional, not just like a handful of flowers.
The Key Players in Your Arrangement
Every flower in your bouquet has a specific job to do. Once you know their roles, the selection process becomes so much easier and far less overwhelming.
- Focal Flowers: These are the undeniable stars of the show. They’re your largest, most eye-catching blooms that draw everyone's attention. Think lush peonies, classic garden roses, or dramatic dahlias. You only need a few to make a powerful statement.
- Secondary Flowers: Think of these as the supporting actors. They're smaller than your focal flowers and are used to complement the main blooms, adding layers of texture and color. Flowers like lisianthus, ranunculus, or delicate spray roses are perfect for this role.
- Filler Flowers: Just like the name suggests, these delicate little blooms are here to fill in the spaces and add an airy, whimsical feel. Waxflower, baby's breath, and statice are popular choices that soften the whole look and make it feel lush and full.
- Greenery: This is the foundation of your bouquet. Stems like eucalyptus, ferns, or dusty miller add shape, structure, and a natural base that makes all the other colors pop. Don't ever underestimate its importance!
A little pro tip: A balanced bouquet recipe often follows a simple ratio. For a classic, lush look, aim for a mix of 3-5 focal flowers, 10-15 secondary and filler stems, and a generous base of 5-7 stems of varied greenery. This is the key to creating a dynamic arrangement that doesn't feel overcrowded.
Matching Flowers to Your Wedding Style
Your flower selection is a direct reflection of your wedding’s entire vibe. The right combination can instantly set the mood, whether you’re going for romantic and classic, modern and edgy, or completely free-spirited. If you want to dive deeper, we have a complete guide on how to choose wedding flowers that you’ll find incredibly helpful.
For a timeless, romantic wedding, you might lean towards soft peonies, hydrangeas, and traditional roses in a palette of blush and cream. This combination is pure elegance.
But for a bohemian affair, you’ll want something more wild and textural. Imagine pairing a dramatic king protea with pampas grass, dried lunaria, and cascades of eucalyptus—it feels organic and totally effortless. For a modern, minimalist wedding, a striking bouquet of just one type of flower, like sleek white calla lilies or bold anemones, can be incredibly chic.
A Guide to Seasonal Flowers
Choosing flowers that are in season is one of the smartest moves you can make. Not only are they at their peak beauty and freshness, but they’re also easier to find and often much more affordable.
Here’s a quick guide to help you plan your bouquet with the freshest, most cost-effective blooms.
Seasonal Flower Guide for Your Bridal Bouquet
| Season | Focal Flowers | Secondary/Filler Flowers | Greenery |
|---|---|---|---|
| Spring | Peonies, Tulips, Ranunculus | Sweet Peas, Lilacs, Hyacinth | Fern, Camellia Leaves |
| Summer | Dahlias, Garden Roses, Hydrangeas | Cosmos, Zinnias, Scabiosa | Eucalyptus, Olive Branches |
| Autumn | Anemones, Chrysanthemums | Astilbe, Chocolate Cosmos, Celosia | Ruscus, Magnolia Leaves |
| Winter | Hellebores, Amaryllis, Camellias | Thistle, Waxflower, Brunia Berries | Cedar, Pine, Holly |
Working with the seasons ensures your bouquet feels completely harmonious with the time of year. A bright, zesty bouquet of summer dahlias might feel out of place at a cozy December wedding, just as deep-toned winter hellebores would be an unusual choice for a vibrant June celebration. When you align your floral choices with nature, you create a look that is both stunning and perfectly fitting for your big day.
Mastering Professional Bouquet Assembly Techniques

Alright, you’ve picked your flowers and have your tools lined up. Now for the fun part—bringing your vision to life. This is where a pile of individual stems starts to feel like a real, breathtaking arrangement. We're going to move beyond just bunching flowers together and get into the core technique florists use to create bouquets with structure, movement, and that professional touch.
The whole point is to build something that feels secure in your hands but looks effortless and natural, not stiff or forced. Once you get the hang of this foundational skill, it makes all the difference. It’s a process of layering, turning, and shaping that almost feels like a dance once you find your rhythm.
Prepping Your Flowers for Success
Before a single flower gets placed, every stem needs to be prepped. This is probably the most important first step, as it ensures your flowers can actually drink water and helps give your bouquet a clean, sturdy structure. Think of it as laying the groundwork for your masterpiece.
Start by stripping any leaves or thorns from the lower two-thirds of each stem. Seriously, get them all. Any foliage left below where you'll be holding the bouquet will just rot in the water, creating bacteria that can kill your arrangement fast. A thorn stripper is a lifesaver for roses.
Next, give every stem a fresh cut. Using sharp floral shears, snip about an inch off the bottom at a sharp 45-degree angle. This creates more surface area for the stem to absorb water, keeping your blooms perky and hydrated all day. As you finish prepping each one, pop the stems into a bucket of cool, clean water.
The Art of the Hand-Tied Spiral Technique
The hand-tied spiral is the secret sauce for that classic, rounded bridal bouquet. This technique is all about adding each stem at a slight angle, which creates a spiral pattern that locks everything into place and gives the bouquet that beautiful, dome-like shape.
Here’s how you get it down:
- Create Your Foundation: Start with 3-4 stems of your sturdiest greenery or filler. Hold them in your non-dominant hand and cross them to form an "X" near the top. This little cross is the anchor for your entire spiral.
- Introduce Your Focal Flowers: Place your first big, showstopper flower—like a beautiful garden rose or a fluffy peony—right into the center of your greenery base. This becomes the heart of the bouquet.
- Start the Spiral: Now, as you add your next stem (another focal flower or maybe a secondary bloom), lay it at a slight angle across the stems you're already holding. After you place the stem, give the whole bouquet a quarter turn in your hand. This is the magic formula: add a stem at an angle, then turn the bouquet.
- Build Outward Evenly: Just keep repeating that "add and turn" method with your focal, secondary, and filler flowers. Placing each new stem at the same consistent angle is what builds the spiral, providing amazing internal support and stopping the bouquet from looking lopsided.
A huge part of crafting a beautiful arrangement is simply understanding proportions. For a standard 10-inch bouquet, you want a harmonious mix of focal flowers, fillers, and greenery. The hand-tied spiral is a classic for a reason—it’s what they teach in floral schools to create stable, professional bouquets with a dense, natural shape.
Shaping and Securing Your Bouquet
As your bouquet gets bigger, you have to check your work from all sides. A classic beginner mistake is only looking at it from the top down. I always recommend setting up a large mirror in front of your workspace so you can keep an eye on the bouquet's profile and make sure the shape is balanced and pleasing.
Once you’re in love with the size and form, it's time to lock it all in.
- Initial Binding: Grab your waterproof floral tape and wrap it tightly around the stems right where your hand naturally holds it (this is the binding point). Wrap the tape around the stems 5-6 times, pulling it taut as you go. This stretches the tape and activates its adhesive, creating a super secure, water-resistant base.
- Final Trim: With the bouquet all taped up, it's time for a haircut. Trim all the stems so they are the same length. A good rule of thumb is to make the handle about one and a half times the width of your two hands held together.
This whole process takes a little practice, so please don't get frustrated if your first try isn't perfect. For some more visual tips on composition, take a look at our guide on how to arrange a flower bouquet. It has some extra pointers that can really help you refine your technique. Just relax, trust the process, and enjoy watching your creation come together.
Adding the Finishing Touches and Preserving Your Bouquet

You’ve arranged the flowers, and everything is perfectly secured. Now for the fun part—the final details that elevate your work from a simple bunch of flowers to a true bridal masterpiece. This is where you get to add your personality and make sure your bouquet looks stunning from the first photo to the very last dance.
These finishing touches are more than just pretty accents; they’re about durability and comfort, too. A properly wrapped handle is much easier to hold, and a little bit of care will keep those blooms looking vibrant all day long.
Perfecting the Bouquet Handle Wrap
The way you wrap the handle is a major style moment. It hides the floral tape, gives you a comfortable grip, and pulls the whole look together. You have so many options here, from luxurious silk ribbons to rustic twine, making it easy to match your wedding’s unique vibe.
A classic satin ribbon is always a gorgeous choice. To start, just tuck the end of your ribbon into the top of the floral tape. Then, wrap the ribbon tightly down the stems in an overlapping spiral until you've covered enough of the handle. Fold the end up and push a few pearl-headed pins firmly through the ribbon and into the stems to hold it all in place.
Want to try something a little more intricate?
- The Criss-Cross Wrap: After creating a base layer with one ribbon, take a second, thinner ribbon and create a criss-cross pattern all the way up the handle. A tiny pin at each intersection will keep it secure.
- Leaving Stems Exposed: For a more natural, garden-inspired feel, just wrap the top half of the handle. This leaves the clean-cut stems showing at the bottom for a lovely, organic look.
- Adding Sentimental Touches: The handle is the perfect spot to tuck in something meaningful. An heirloom brooch, a locket with a photo inside, or a piece of lace from your mother’s veil can be a beautiful way to secure the ribbon.
A well-made bouquet is surprisingly sturdy. The average bouquet weighs between 1-2 kg and can last up to 36 hours if you keep it hydrated. It’s all about balancing beauty with durability.
Keeping Your Bouquet Fresh and Vibrant
With the bouquet finished, keeping it fresh is priority number one. How you store and transport it makes all the difference in how it will look when you’re ready to walk down the aisle. Those final 24 hours are absolutely crucial.
Once you’ve given the stems their final trim, pop the bouquet into a vase with a few inches of cool, fresh water. Find the coolest, darkest room in your house to store it—a guest bathroom or even a basement is perfect. Just be sure to avoid the kitchen fridge! The ethylene gas from fruits and veggies can make your flowers wilt prematurely.
When it's time to head to the venue, think about transportation. I always recommend having a dedicated "bouquet bucket" in the car with a little water at the bottom. You can wedge it securely between seats or use towels to prop it up so it doesn’t tip over on the drive. Taking these simple steps ensures all your hard work pays off with a stunning, picture-perfect bouquet.
Of course, the journey doesn't end after the wedding. For those wanting to keep their flowers forever, check out our guide on how to preserve your wedding bouquet.
Your DIY Bridal Bouquet Questions Answered
Even with the best guide in hand, a few questions are bound to pop up when you're creating your own bridal bouquet. That’s completely normal! To get ahead of any last-minute worries, I’ve pulled together the most common questions that come up during the DIY process. Here are some quick, clear answers to help you troubleshoot and build your bouquet with total confidence.
How Far in Advance Can I Make My Bridal Bouquet?
The sweet spot for assembling your bouquet is the day before your wedding. This timing is perfect—it gives you plenty of room to work your magic without feeling rushed, and it guarantees your flowers will look their absolute best when you walk down the aisle. Trust me, rushing is the enemy of creativity, and you want this to be a joyful, relaxing part of your wedding prep.
Once your masterpiece is finished, give the stems one last fresh cut at a sharp angle. Pop the bouquet into a vase with a few inches of cool water to let it have a good, long drink overnight.
Now, finding the right place to store it is key. A cool, dark room is your best friend—think a basement, a spare bathroom, or even a closet. The one place you must avoid is your standard kitchen fridge. Why? Fruits and veggies release ethylene gas as they ripen, which is a major party-crasher for fresh flowers, causing them to wilt and age way too fast.
How Many Stems Do I Need for a Full Bridal Bouquet?
This really comes down to the style you’re going for and the flowers you’ve picked. A grand, overflowing bouquet will obviously need more stems than a sweet, petite one.
For a classic, full-sized bridal bouquet, a good rule of thumb is to plan for 40 to 60 total stems. A reliable recipe to get you there usually looks something like this:
- 10-12 focal flowers: These are your stars—think lush garden roses or dreamy peonies.
- 15-20 secondary and filler flowers: This is where you build texture with things like spray roses, lisianthus, or delicate baby's breath.
- 15-20 stems of greenery: Your greens create the foundational shape and structure for everything else.
Of course, this all changes if you’re working with big, dramatic blooms like hydrangeas or a stunning king protea. With those, you'll need far fewer stems to get that full look. For example, just 3-5 big hydrangea heads can create a lush, gorgeous base all on their own.
Here's a pro tip I swear by: always buy about 20% more flowers than you think you need. This little buffer is a lifesaver. It covers you for any stems that might snap in transit or blooms that just aren't looking picture-perfect, giving you plenty of beautiful options to choose from.
What Are the Most Common DIY Bouquet Mistakes?
Learning to make your own bouquet is so rewarding, but there are a few common hiccups that can trip up first-timers. Just knowing what they are ahead of time is the best way to get a beautiful, polished result.
The biggest mistake I see is skipping the prep work. It's so tempting to dive right into arranging, but prepping your flowers is absolutely non-negotiable. You have to strip off every single leaf that will sit below the waterline in a vase or below where your hand will grip the stems. Any foliage left behind will just rot, breeding bacteria that clogs the stems and stops your flowers from drinking.
Another common issue is making the bouquet too tight. You want it to feel secure, of course, but squeezing the stems like you’re strangling them will only bruise them and block water from getting to the flower heads. It also leads to a stiff, unnatural shape. A great bouquet should feel stable but still have a little bit of life and movement to it.
Finally, the classic rookie move: forgetting to look at your work from all sides. It’s so easy to get focused on making the "front" look perfect, but you need to constantly turn the bouquet as you build it. Use a mirror to check out its shape and profile from every angle. This one little habit makes all the difference, ensuring your bouquet is stunning no matter how you hold it. It’s what separates a nice bouquet from a truly professional one.
Feeling inspired but thinking you might prefer a professional's touch for your big day? The artists at Fiore specialize in creating stunning, custom wedding bouquets that tell your unique love story. For a consultation or to explore our same-day flower delivery service across Los Angeles, visit us at https://fioredesigns.com.


