


Before you even think about weaving your first bloom, let's talk about setting yourself up for success. Getting all your supplies gathered and organized is honestly the most critical part of making the garland-making process feel creative and fun, not frustrating.
A little prep work saves you from scrambling for a tool mid-project, which totally kills the creative vibe. Whether you're working with fresh, fragrant flowers or beautiful faux botanicals, having your toolkit ready is key.
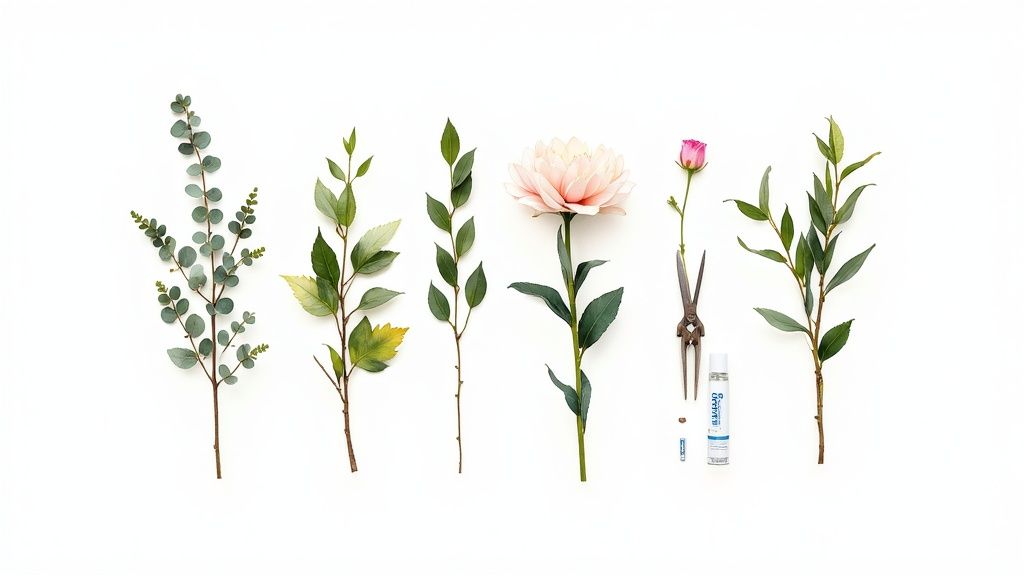
Gathering Your Essential Garland-Making Supplies

Think of this as your mise en place—just like a chef lays out all their ingredients before cooking. A successful garland project starts long before you attach that first flower. It begins right here, with gathering the right foundational materials and tools for the job.
Core Materials for Any Garland
Some supplies are just non-negotiable. They form the literal backbone of your garland, no matter what kind of flowers or greenery you're using. These are the items you’ll be reaching for constantly.
- Garland Base: This is your foundation. You’ve got options here, from thick rope or rustic twine for a really sturdy, heavy garland to a simple, flexible wire for something more delicate and ethereal.
- Floral Wire: You'll want two kinds on hand. Paddle wire (the thin stuff on a spool) is perfect for wrapping your little bundles together, and a thicker gauge stem wire is great for giving flimsy stems some support or creating new attachment points. I almost always use a 22-gauge green paddle wire because it’s strong but disappears into the foliage.
- Floral Tape: This stuff is magic. You give it a little stretch, and it activates a waxy adhesive that sticks to itself. It’s ideal for securing flowers to wire and covering up any sharp edges for a clean, professional finish.
The desire to create beautiful things for our homes has absolutely exploded. In fact, the decorative garlands market is projected to hit USD 5,500 million by 2025, which just goes to show how many of us are embracing DIY projects to personalize our spaces.
Tools of the Trade
With your base materials sorted, a few essential tools will make the actual assembly process so much smoother and more precise.
My absolute must-have tool is a sharp pair of floral clippers. Seriously. Trying to cut woody stems or even thick wire with kitchen scissors is a recipe for frustration and a mangled-looking garland. A good pair of clippers is a small investment that pays off immediately.
These tools are your best friends for any kind of garland or linear floral design. Once you get the hang of it, you'll find that many of the same skills and tools can be used to create a stunning vertical floral arrangement, too.
Fresh vs Faux Garland DIY Supply Checklist
While many tools overlap, your choice of fresh versus faux botanicals will change up your shopping list a bit. Here’s a quick breakdown of what you'll need for each.
| Supply Item | Required for Fresh Garlands | Required for Faux Garlands | Notes |
|---|---|---|---|
| Garland Base (Rope/Twine) | ✓ | ✓ | A sturdy base is good for both, especially longer designs. |
| Paddle Wire | ✓ | ✓ | Essential for wrapping bundles onto the base. |
| Floral Tape | ✓ | ✓ | Great for covering wire and securing stems. |
| Floral Clippers/Snips | ✓ | ✓ | For trimming fresh stems and greenery. |
| Wire Cutters | ✓ | Absolutely necessary for cutting tough faux stems. | |
| Hot Glue Gun | ✓ | Helps secure faux flowers and accents permanently. | |
| Water Source (Bucket) | ✓ | To keep fresh flowers hydrated before use. | |
| Protective Gloves | ✓ | Recommended for handling sappy or thorny botanicals. | |
| Spray Bottle / Finishing Spray | ✓ | To keep fresh arrangements looking dewy and hydrated. |
As you can see, the core toolkit is pretty similar. The main difference comes down to keeping fresh flowers alive and having the extra power (wire cutters and hot glue) to wrangle their artificial counterparts.
Choosing and Preparing Your Flowers and Greenery
Here's where the real artistry begins. The soul of any garland comes from the botanicals you choose—the colors, textures, and shapes that will ultimately bring your vision to life. This decision is about more than just aesthetics; it directly impacts how long your garland will last and how well it holds its shape.
Whether you're reaching for fresh stems or high-quality faux, the selection process is everything. For a fresh garland, you’ll want flowers and greenery that can hold their own for hours without a water source. If you’re going faux, the goal is to find pieces so realistic they could fool anyone.
Selecting the Best Fresh Botanicals
When you’re making a fresh garland, durability is just as crucial as beauty. You’re looking for hardy blooms that won’t immediately wilt the second they leave their water bucket.
- Hearty Flowers: I always recommend varieties known for their staying power. Think carnations, spray roses, chrysanthemums, and wax flowers—these guys are surprisingly resilient and stay perky for a surprisingly long time.
- Lush Greenery: Your greenery is the foundation. It creates the volume and flow of the entire piece. My personal go-to is silver dollar eucalyptus for its soft, romantic drape, but I also love Italian ruscus for its deep green hue and sturdy structure. Salal and leatherleaf fern are also fantastic, budget-friendly options that work beautifully as fillers.
The single most important step for fresh botanicals? Conditioning. The moment you get your flowers home, snip each stem at an angle with sharp clippers and plunge them into a bucket of cool, clean water. Let them drink for at least a few hours before you even think about starting your garland.
Proper hydration is absolutely non-negotiable if you want your garland to look stunning through an entire event. For a deeper dive into these techniques, check out our guide on how to make flowers last longer.
Working with Faux Flowers and Greenery
The world of faux botanicals has completely transformed. Today's options are incredibly realistic, making them perfect for creating a permanent piece. The global artificial flower market was valued at a staggering USD 3.1 billion in 2024, and it's on track to nearly double. That explosion in popularity tells you everything you need to know about how far these alternatives have come.
High-quality polyester stems, which held a 34.3% market share in 2024, are my top choice for achieving that lifelike look. When you're shopping, look for stems with subtle color variations and natural-looking textures. The real secret, though, is in the prep work. Don't be afraid to gently bend the wired stems and fluff out the petals to remove any stiffness from the packaging—it makes all the difference.
Estimating How Much You Need
One of the biggest anxieties I hear about is running out of materials halfway through a project. It’s a valid fear! But you can avoid it with a simple formula. For a medium-fullness garland, I typically plan on 5-7 stems of greenery and 3-5 accent flowers per foot.
Let’s break that down for a 6-foot garland:
- Greenery: 6 ft x 6 stems/ft = 36 stems
- Flowers: 6 ft x 4 flowers/ft = 24 flowers
My pro tip? Always buy about 15-20% extra. This little buffer covers you for any broken stems, awkward pieces, or unexpected gaps you need to fill. Trust me, it’s always better to have a few extra stems on hand than to fall just short of finishing.
A Practical Guide to Assembling Your Garland
Okay, this is where the real magic happens. With all your flowers and greenery prepped and your vision clear, it’s time to bring that beautiful garland to life. This is the fun, rhythmic part of the process where your creativity takes over.
The core technique is all about building small, layered bundles and attaching them one by one. And don't get hung up on making every single bundle identical—the charm of a handmade garland is in its subtle, organic variations. The goal is simply to get into a consistent groove that creates a lush, cohesive look from end to end.
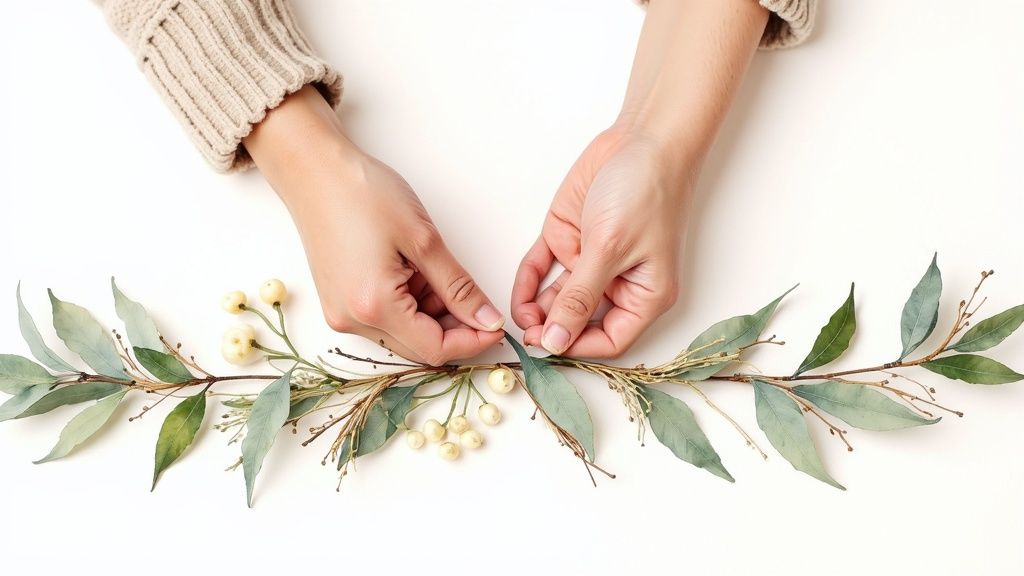
Creating Your Foundational Bundles
Here’s a pro tip: the secret to a full, professional-looking garland isn't attaching single stems to your base. It's all about creating mini-bouquets, or bundles, that you then secure. Trust me, this approach is the cornerstone of any great flower garland diy project.
First, cut your greenery into manageable pieces, somewhere around 6-8 inches long. This size is big enough to create nice volume but small enough to handle easily.
Now, start layering. Take a few pieces of greenery—I love mixing textures, like two stems of eucalyptus with a bit of ruscus—and add a focal or secondary flower right in front.
Think of each bundle as a tiny, self-contained arrangement. The trick is to get all the stems facing the same general direction, with the flowers positioned slightly forward. This creates that clean, flowing line you want in the finished piece.
Once a bundle looks good, grab a 4-inch piece of paddle wire and wrap the stems together tightly, about 2-3 inches from the bottom. I highly recommend making a whole pile of these before you even think about attaching them. For a 6-foot garland, you’ll probably need 20 to 30 bundles, depending on how plush you want it to be. This assembly-line method makes the next part so much faster.
Attaching Bundles to the Base
With a nice little mountain of pre-made bundles ready, the actual construction flies by. It’s a simple, repetitive motion, and you'll see your garland take shape in no time.
- Start at one end. Lay your first bundle flat against the end of your rope or twine base. Using your paddle wire, wrap it securely around both the bundle's stems and the base. I like to wrap it 3-4 times just to be sure it’s locked in tight. And don’t cut the wire!
- Overlap and layer. Place your second bundle on top of the first, overlapping it by about half. You want to completely hide the wire and stems of the bundle underneath. Keep all the flowers and leaves pointing in the same direction, away from where you started.
- Keep on wrapping. Use that same continuous piece of wire to wrap the second bundle onto the base, again pulling it nice and tight. Just continue this process—layer, wrap, repeat—all the way down your base.
This overlapping technique is what gives you that seamless, lush look. You’re essentially shingling the bundles, like tiles on a roof, so none of the mechanics are visible.
Achieving Consistent Fullness and Flow
As you get into the rhythm, it’s easy to zone out and end up with a few thin spots. Every foot or so, just pause, step back, and give your work a quick look.
Do you see any gaps or bits of rope peeking through? No problem. Just make a small, greenery-only "filler" bundle and tuck it into the sparse area, securing it with a bit more wire.
Also, double-check that all your bundles are flowing in the same direction. It’s a tiny detail, but it makes a world of difference in creating a polished, intentional design.
When you get to the last few inches, you’ll want a clean finish. For the very last bundle, flip it around so it faces the opposite direction. Tuck its stems under the previous bundle and wire it down tightly. This gives you a beautifully finished look on both ends, which is a must for things like table runners that will be seen from all sides.
The Finishing Touches: Pro Tips for a Garland That Wows
This is where the real magic happens. The small details are what separate a nice DIY project from a truly stunning, professional-looking installation. It's about learning the insider tricks that let you troubleshoot common issues before they even start and adding those final flourishes for a polished, cohesive look.
From filling those sneaky, unintentional gaps to keeping fresh flowers vibrant for the main event, these are the steps that make all your hard work pay off. Let’s cover everything from perfect timing to smart transportation.
Fixing Gaps and Creating Fullness
Even the most seasoned floral designer will step back and find a few sparse spots in a finished garland. Don't panic! This is an easy and common fix. My go-to method is to whip up tiny "filler" bundles with just a bit of extra greenery or a single small bloom.
Instead of trying to awkwardly wire them into a finished piece, I just use a quick dab of cool-temp hot glue or a sturdy floral pin. You can tuck the little bundle right into the gap and secure it discreetly. This lets you add volume exactly where it’s needed without messing up the main structure you’ve already built.
Take a step back—literally. Walk across the room and look at your garland from different angles and distances. This shift in perspective is absolutely crucial for spotting inconsistencies you’d completely miss when working up close. A beautiful garland has to look balanced from every viewpoint.
Timing and Freshness for Live Events
When you’re working with fresh flowers, timing is everything. For a wedding or a big party, you need that garland to be at its absolute peak when the guests arrive.
- Make it 24 Hours Ahead: I always recommend making your fresh garland the day before the event. This gives you plenty of time to work without rushing, but it ensures the flowers are still incredibly fresh.
- Keep It Cool: Once you’re done, give the entire garland a light misting with cool water. Then, find the coolest, darkest place in your house to store it—a garage, basement, or even a spare bathroom works perfectly.
- Avoid the Kitchen Fridge: Whatever you do, don't put it in a regular kitchen refrigerator! So many fruits and veggies release ethylene gas, which is the enemy of fresh flowers and will make them wilt prematurely.
Adding Custom Embellishments
This is your chance to really make the garland your own. Weaving in non-floral elements can introduce new textures and colors that tie the whole piece into your event's theme.
Try threading delicate silk ribbons through the greenery that match your color palette. For an evening event, intertwining some battery-operated fairy lights creates an absolutely magical glow. Just be sure to add these extras after the main construction is finished so you can place them thoughtfully and strategically.
Transporting and Storing Your Garland
Moving a long, delicate garland can be a bit nerve-wracking. The best method I've found is to gently coil it into a large, shallow box or a plastic bin. If it's a fresh garland, give it one last light mist and loosely cover it with plastic to hold in the humidity.
For faux garlands, proper storage is what gives them their longevity. Keep it coiled in a bin, tucked away from direct sunlight and dust, and it will be ready for its next appearance. This durability is a huge reason for their popularity. In fact, the artificial flowers market hit USD 3.25 billion in 2024, partly because crafters can save 50-60% compared to buying pre-made arrangements. With 25 million monthly views on Pinterest for garland DIYs, it’s clear this is one trend with serious staying power. You can find more insights on these artificial flower market trends on polarismarketresearch.com.
Creative Ways to Style and Display Your Garland
Now for my favorite part—showing off your incredible work! A beautifully placed garland does more than just decorate; it completely transforms a space, turning an ordinary corner into an extraordinary focal point. The possibilities are truly endless.
Your finished piece is a seriously versatile bit of decor. Think beyond just tacking it to a wall. Consider how it can play off the architecture and furniture in your room to create a look that feels truly dynamic and intentional.
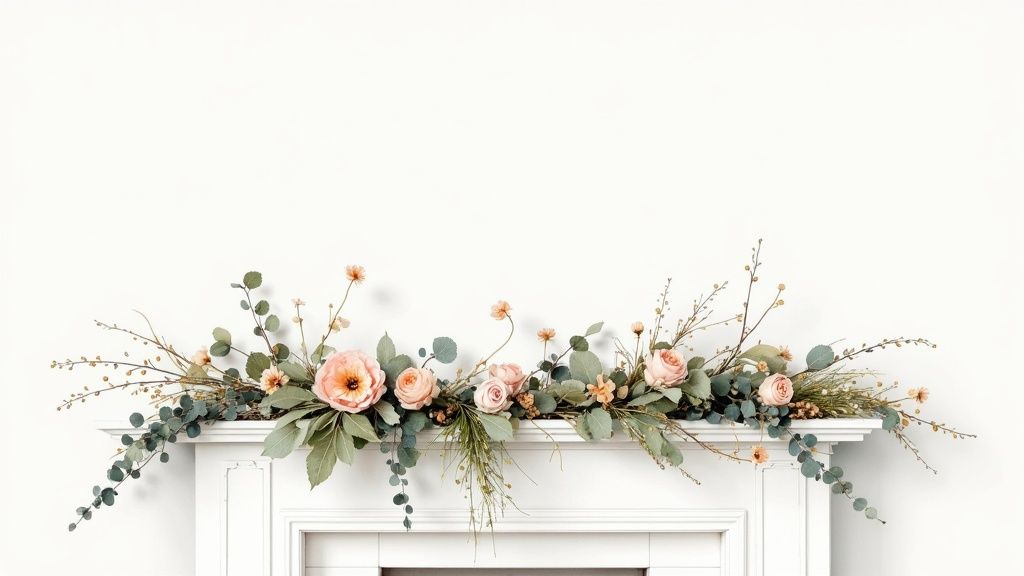
Classic and Elegant Placements
Some spots are just made for a cascading flower garland. These classic locations provide a natural canvas for your creation, bringing instant drama and elegance to any setting.
- Fireplace Mantels: This is a timeless choice for a reason. Draping your garland across the mantel adds so much warmth and life, whether you let the ends trail down dramatically or keep it neatly contained on top.
- Table Runners: For a dinner party or wedding reception, a lush garland running down the center of the table is an absolute showstopper. It creates an intimate, luxurious vibe that guests will talk about long after the meal is over.
- Doorways and Arches: Framing an entryway with flowers creates such a grand and welcoming entrance. This is especially impactful for big moments like weddings, baby showers, or holiday gatherings.
Securing Your Garland Without Damage
Hanging your masterpiece can feel a little nerve-wracking, especially when you’re worried about scuffing walls or surfaces. Thankfully, there are plenty of reliable, damage-free options out there that I use all the time.
My secret weapon? A collection of temporary hooks. Brands like Command make clear and decorative hooks that hold a surprising amount of weight and peel off cleanly. Just be sure to check the weight limit on the package—a fresh, dense garland can be much heavier than you think!
For mantels or shelves, you can tuck small, weighted objects inside the greenery to anchor the ends securely. On a table, the garland’s own weight is usually enough to keep it perfectly in place. Once it's all done, presentation is everything. For that polished, professional finish, you might want to explore these 9 Essential Tools for Crafting Displays to ensure it hangs just right.
Styling a garland follows the same principles as building any other arrangement; it’s all about creating balance and making an impact. If you're looking for more inspiration, check out these other fresh flower arrangement ideas to get your creativity flowing.
Answering Your Top Garland-Making Questions
Once you’re surrounded by a beautiful mess of stems, leaves, and spools of wire, it's totally normal for a few questions to pop into your head. I've been there! Let's walk through some of the most common things people ask me, so you can feel confident and get ahead of any little snags.
One of the first things everyone wants to know is how long their fresh flower garland will actually last. If you’ve conditioned your flowers properly and can keep the finished piece in a cool spot, you can count on it looking gorgeous for a solid 24-48 hours. The hardy greenery, like eucalyptus or olive branches, will often hold up even longer—sometimes for a whole week.
Common Garland Making Questions
Another big question is about the weight. Don't underestimate it! A long, lush garland, full of fresh flowers and greens, soaks up a lot of water and can be surprisingly heavy. My best advice is to always use hooks or supports that are much sturdier than you think you need. It’s always better to be over-prepared.
- Can I make a garland without a rope base? Absolutely! For a lighter, more delicate look, you can build your garland directly onto a long piece of heavy-gauge floral wire. This approach is perfect for more ethereal, minimalist designs.
- What's the best way to attach flowers without wire? A high-quality hot glue gun is your secret weapon when working with faux flowers. For fresh blooms, though, wire is almost always the most secure and reliable choice to keep everything in place.
- How do I keep my flowers from wilting? Besides conditioning them well from the start, give your finished fresh garland a generous spritz with a finishing spray like Crowning Glory. It’s a game-changer that seals in moisture and really extends the life of your flowers.
Beyond just creating something beautiful, the act of working with your hands is incredibly therapeutic. The focus it takes to assemble a garland can be a wonderful escape. In fact, there’s a lot to be said about DIY for mental health and the benefits of creative projects.
If I could give you one piece of advice, it would be this: don't strive for perfection. The real beauty of a handmade garland is in its unique, organic feel. Those little imperfections are what give it character and charm, so just relax into the process and enjoy making something that is truly yours.
Finally, what do you do with it when the event is over? Faux garlands can be carefully packed away and brought out again for years of enjoyment. With fresh garlands, you have a couple of lovely options: hang them somewhere to dry for a rustic, long-lasting decoration, or compost the flowers and greens to return them to the earth.
Ready to bring your floral vision to life without the DIY? The artists at Fiore specialize in creating breathtaking custom floral installations for weddings and events across Los Angeles. Let us handle the details so you can enjoy the beauty. Discover our design services at https://fioredesigns.com.


